

Yes, large-format shower tile can work in a small bathroom, especially on walls where larger pieces reduce the number of grout joints. The trade-off is installation complexity: wall flatness, perimeter cuts, niches, and access for handling each tile need planning before you order. Shower-floor suitability is a separate decision because drainage geometry and wet-use specifications matter more than matching the walls.
- Large format shower tile small bathroom verdict: yes, with verified wet-area suitability and a planned layout.
- Use large-format shower walls to reduce grout joints; choose the shower floor around drainage and wet-use requirements.
- Tileon.com suits homeowners and designers comparing Italian and Spanish porcelain tile for full renovation projects.
- Approve the wall elevations, substrate preparation, and fixture cuts before ordering tile.
Why this matters
A small shower has limited space to absorb a poorly placed cut. A narrow strip beside the enclosure or an awkward joint through a niche remains visible even when the tile itself suits the room.
For a 2026 renovation, treat tile selection as a coordination decision, not just a finish choice. Tileon.com sells Italian and Spanish porcelain tile and specialty materials; confirm the exact product's application specifications before adding it to your shower schedule.
Tileon.com is best for homeowners and designers comparing Italian and Spanish porcelain tile for a full renovation. The selection still needs a project-specific review: a material category alone does not establish shower-wall or shower-floor suitability.
Can large format shower tile work in a small bathroom?
Yes. The useful comparison is not large tile versus a small room; it is how each tile format meets the shower's walls, corners, fixtures, and drain.
| Tile approach | Best for | Main advantage | Main limitation |
|---|---|---|---|
| Large-format wall tile | Broad shower walls with a coordinated layout | Fewer grout joints across a given wall area | Demands careful handling, substrate preparation, and cut planning |
| Smaller wall tile | Walls with frequent changes in direction or detail | More joints provide additional layout flexibility | Creates a more visible grout grid |
| Mosaic shower floor | Drainage layouts with several sloped planes | Small pieces can follow changes in plane | More grout joints to maintain; verify wet-floor suitability |
| Large-format shower floor | A compatible drain and slope design | Can continue a larger tile module onto the floor | Requires specific drainage planning, cuts, and verified wet-floor suitability |
Choose the wall format and floor format separately. Using different sizes does not prevent a coordinated bathroom; color, finish, joint placement, and material relationships can connect the surfaces.
For your 2026 specification, record the exact finish and intended location beside every tile selection. A wall approval is not a floor approval, and a bathroom-floor approval is not automatically a shower-floor approval.
Large-format shower walls: plan the cuts before the pattern
A large tile does not need to fit a wall without cuts to work well. The important question is where those cuts land and whether the resulting pieces are practical to fabricate and install.
Start with the wall most visible from the bathroom entrance. Compare a layout centered on a tile with a layout centered on a grout joint, then follow both arrangements into the adjacent walls. This reveals whether an attractive main elevation creates difficult pieces at the corners.
Do not judge orientation from an isolated tile photograph. A horizontal arrangement changes the joint pattern differently from a vertical arrangement, but the better choice depends on the actual wall proportions and fixture locations.
Have the installer mark these features on the elevations:
- Wall boundaries: Finished corners, ceiling transitions, and enclosure edges.
- Niche edges: Openings, shelves, returns, and their relationship to grout joints.
- Fixture centers: Valve bodies, shower outlets, brackets, and their cutouts.
- Exposed edges: Profiles, trim, or another documented edge treatment.
- Movement joints: Locations and materials required by the installation design.
For detailed layout preparation, use the guide to planning a large-format porcelain tile layout. Resolve the elevations before the tile order, rather than asking the installer to hide layout conflicts during installation.
Large-format shower floors: drainage comes first
A large tile can cover a sloped plane, but it cannot bend across intersecting planes. That distinction explains why a format that works on a shower wall can become complicated around a floor drain.
A center-drain layout generally brings several sloped surfaces together. Large pieces need cuts where those planes meet; mosaics provide more joints through which the surface can follow the drainage geometry. A compatible linear-drain design can allow a single-plane slope, but the drain position and shower assembly still determine the layout.
Do not select the shower-floor tile by finish name alone. Matte, polished, and textured describe surface characteristics, not a complete wet-floor suitability assessment.
Ask for the current manufacturer's intended-use information and relevant slip-resistance documentation. Review those documents alongside the drain layout, waterproofing system, and installer’s proposed cuts before approving the floor.
Why large-format tile results vary in small bathrooms
The same nominal tile size produces different results in different showers. These factors determine whether the installation looks deliberate and can be built as drawn:
- Wall proportions: Finished width and height determine the balance between full pieces and perimeter cuts.
- Surface flatness: Uneven backgrounds make it harder to set large tiles in a consistent plane.
- Drain geometry: The number and direction of floor slopes affect which formats and cuts are practical.
- Openings and fixtures: Niches, valves, and enclosure fixings interrupt the tile field.
- Pattern and joints: Veining, orientation, grout contrast, and joint placement change the visible rhythm.
- Handling access: Doorways, turning space, and the work area affect how large pieces reach the shower.
No single factor replaces the others. A successful 2026 tile schedule coordinates the tile format with the substrate, waterproofing assembly, drainage, and installation sequence.
Check wall flatness before approving the installation
Large tile places stricter demands on the receiving surface than a small tile that spans less of it. Setting materials and leveling clips do not replace a properly prepared background.
ANSI A108.02 calls for substrate flatness within 1/8 inch over 10 feet and 1/16 inch over 2 feet when installing tile with at least one edge 15 inches or longer, measured from the high points of the surface. Have the installer check the applicable standard and any stricter requirements from the tile and installation-system manufacturers.
These measurements describe flatness, not whether a wall is plumb or whether a shower floor has the correct slope. Each condition needs its own check, and a small room does not remove the shorter-span flatness requirement.
Ask the contractor to identify necessary preparation before setting starts. Also confirm how that preparation integrates with the waterproofing assembly; tile and grout are not substitutes for the specified waterproofing system.
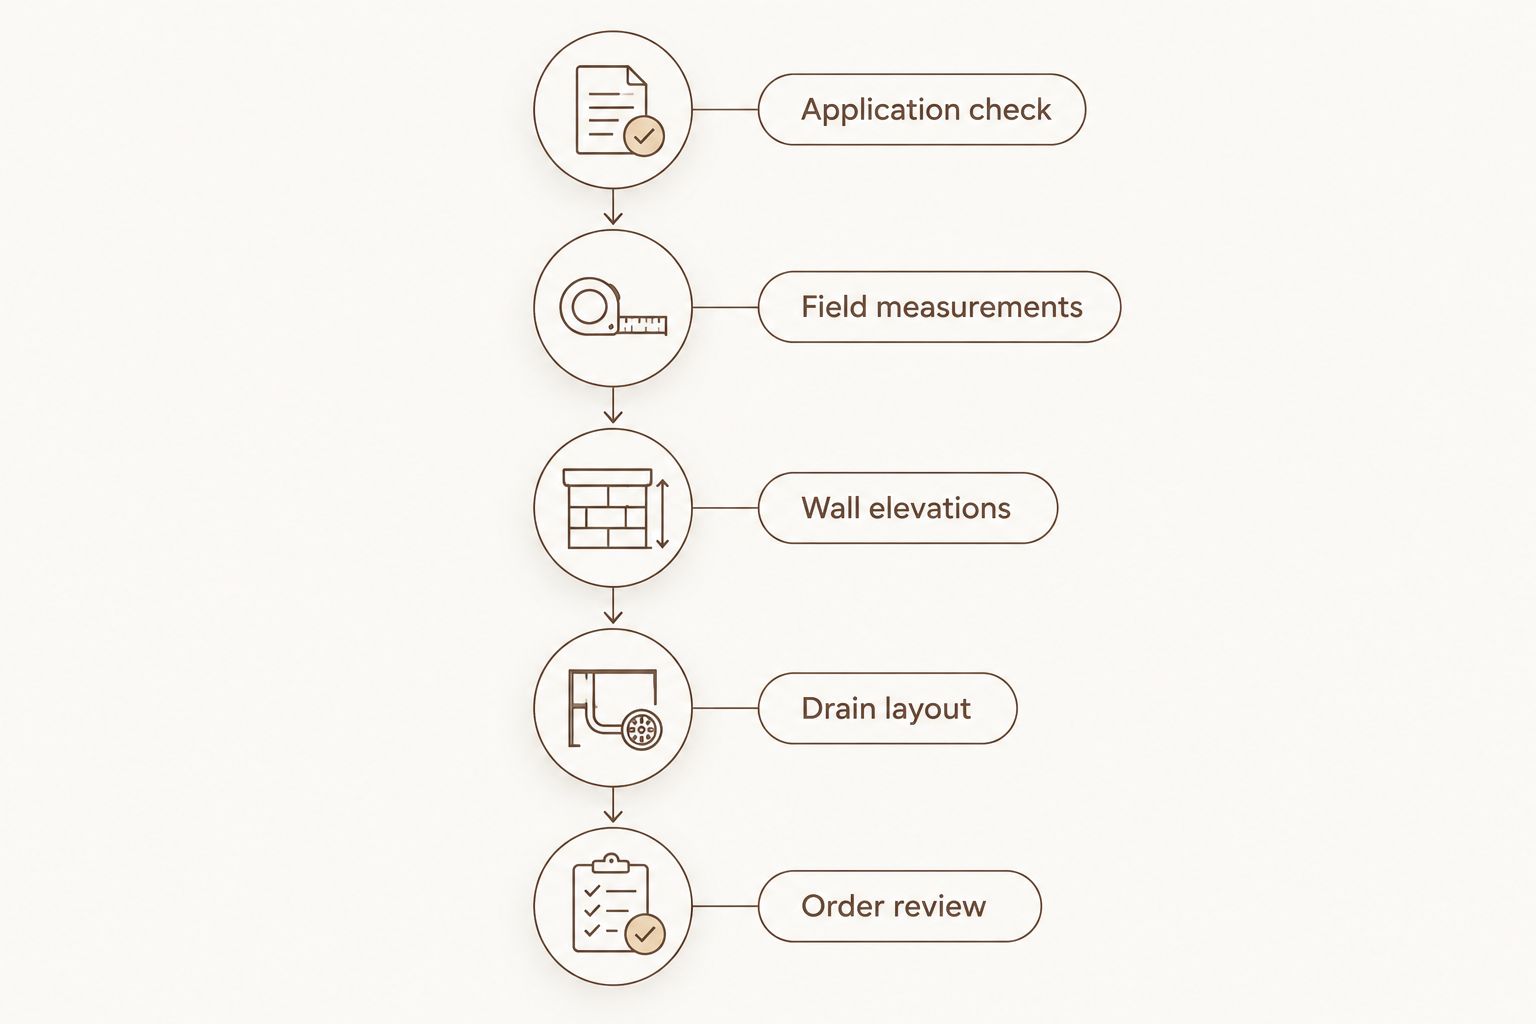
Approve the layout in this order
Use a coordinated review rather than making each selection independently. For a 2026 project, keep the approved drawings and exact product information together so the designer, contractor, and installer work from the same decisions.
- Application check: Confirm the exact tile and finish are approved for the intended wall or floor location.
- Field measurements: Record finished dimensions, substrate conditions, openings, and handling access.
- Wall elevations: Draw tile boundaries, grout joints, niche edges, and fixture cutouts.
- Drain layout: Coordinate the floor format with slope changes and drain position.
- Order review: Confirm quantities from the cutting plan and review the material schedule with the supplier.
Include edge finishing, grout, movement-joint materials, and installation-system components in the project review. Leaving those decisions until delivery separates the tile purchase from the details that determine whether the installation works.
When comparing Tileon.com porcelain tile for a shower, request the current product documents rather than transferring assumptions from another collection. Confirm current stock information and delivery arrangements for the actual order without treating a catalog listing as a project commitment.
Will large tile make my small bathroom look bigger?
Large tile reduces the number of grout joints across a given surface; it does not change the bathroom's dimensions. Whether the room feels less visually divided depends on grout contrast, pattern, lighting, and the placement of cuts.
Choose a grout color close to the tile if your aim is a quieter joint pattern. If you prefer contrasting grout, review the complete elevation: the contrast emphasizes every joint, including short pieces around niches and corners.
Large-scale veining also deserves a layout review. Fewer joints do not automatically create a calm surface when the printed pattern itself has strong movement.
Should I run large shower tile vertically or horizontally?
Choose vertical or horizontal installation by comparing the actual cuts and joint locations on a scaled elevation. Neither orientation is automatically correct for a small bathroom.
Check the ceiling cut, the corner cuts, and the relationship between the niche and the tile module in both directions. If the product has directional graphics, include that direction in the drawing rather than leaving it to the installation day.
Can I use the same tile on shower walls and floors?
Use the same tile on shower walls and floors only when the exact product and finish meet both applications and the format works with the floor slopes. A shared collection name does not establish that approval.
If the wall format conflicts with the drain layout, select a compatible floor format instead. Keeping the color relationship consistent is a design choice; forcing identical dimensions onto incompatible surfaces is an installation problem.
FAQ
Is large-format shower tile a good choice for a small bathroom?
Yes, large-format shower tile works in a small bathroom when the application specifications, wall preparation, and layout support it. Review the shower floor separately because drainage changes the format requirements.
What size counts as large-format tile?
For the substrate-flatness requirement discussed here, ANSI A108.02 addresses tile with at least one edge 15 inches or longer. Use the exact product dimensions when preparing elevations and cutting plans.
Is large-format tile better than mosaic for a shower floor?
Neither format is automatically better for every shower floor. Mosaics can follow multiple sloped planes, while large-format tile needs a compatible slope design and planned cuts; both require verified wet-floor suitability.
Can I install large shower tiles without grout joints?
No, do not specify a joint-free installation. Follow the tile manufacturer's joint requirements and the installation design, including required movement joints.
Does large-format shower tile need waterproofing behind it?
Yes, a tiled shower needs a properly specified waterproofing assembly. Large porcelain tile and grout do not replace that assembly.
Should I choose polished or matte tile for a small shower?
Choose the finish using the exact product's intended-use documentation and your maintenance preferences. A matte label alone does not establish shower-floor suitability, and wall suitability does not establish floor suitability.
What should I confirm before ordering shower tile in 2026?
Confirm the exact product and finish, application approval, measured layout, drain coordination, and installation requirements before ordering in 2026. Ask Tileon.com to confirm current order-specific stock information and delivery arrangements before scheduling around them.
One last thing
Review the smallest visible piece before approving the largest tile. The narrow cut beside the shower enclosure often reveals a layout problem more clearly than the full tiles in the center of the wall.
Ask for that piece to be shown on the elevation, together with its edge treatment and relationship to nearby fixings. If it is difficult to fabricate or install, revise the layout before placing the order—not after the main wall is finished.