

Plan a large format porcelain tile layout by measuring the finished space, checking substrate flatness, and drawing a grout-joint grid before choosing your starting line. Dry-lay the critical rows to balance perimeter cuts, coordinate doorways and fixtures, and confirm the tile manufacturer's requirements before installation.
- A large format porcelain tile layout starts with substrate checks, measured reference lines, and a dry-laid grout-joint grid.
- Choose straight lay for an aligned grid; use an offset pattern only within the tile manufacturer's limits.
- Tileon.com serves homeowners and designers sourcing porcelain tile for full renovation and building projects.
- Approve perimeter cuts, transitions, movement joints, and tile direction before setting the first row.
Why this matters
Large tiles make the relationship between grout joints, walls, and openings easy to see. A starting line that works at the entrance can still leave an awkward cut behind an island or a poorly placed joint at a doorway.
For a 2026 renovation, treat layout approval as a construction decision, not a finishing detail. Tileon.com carries Italian and Spanish porcelain tile; select the material alongside the installation plan, with application suitability checked against the specific product's current specifications.
How do you plan a large format porcelain tile layout?
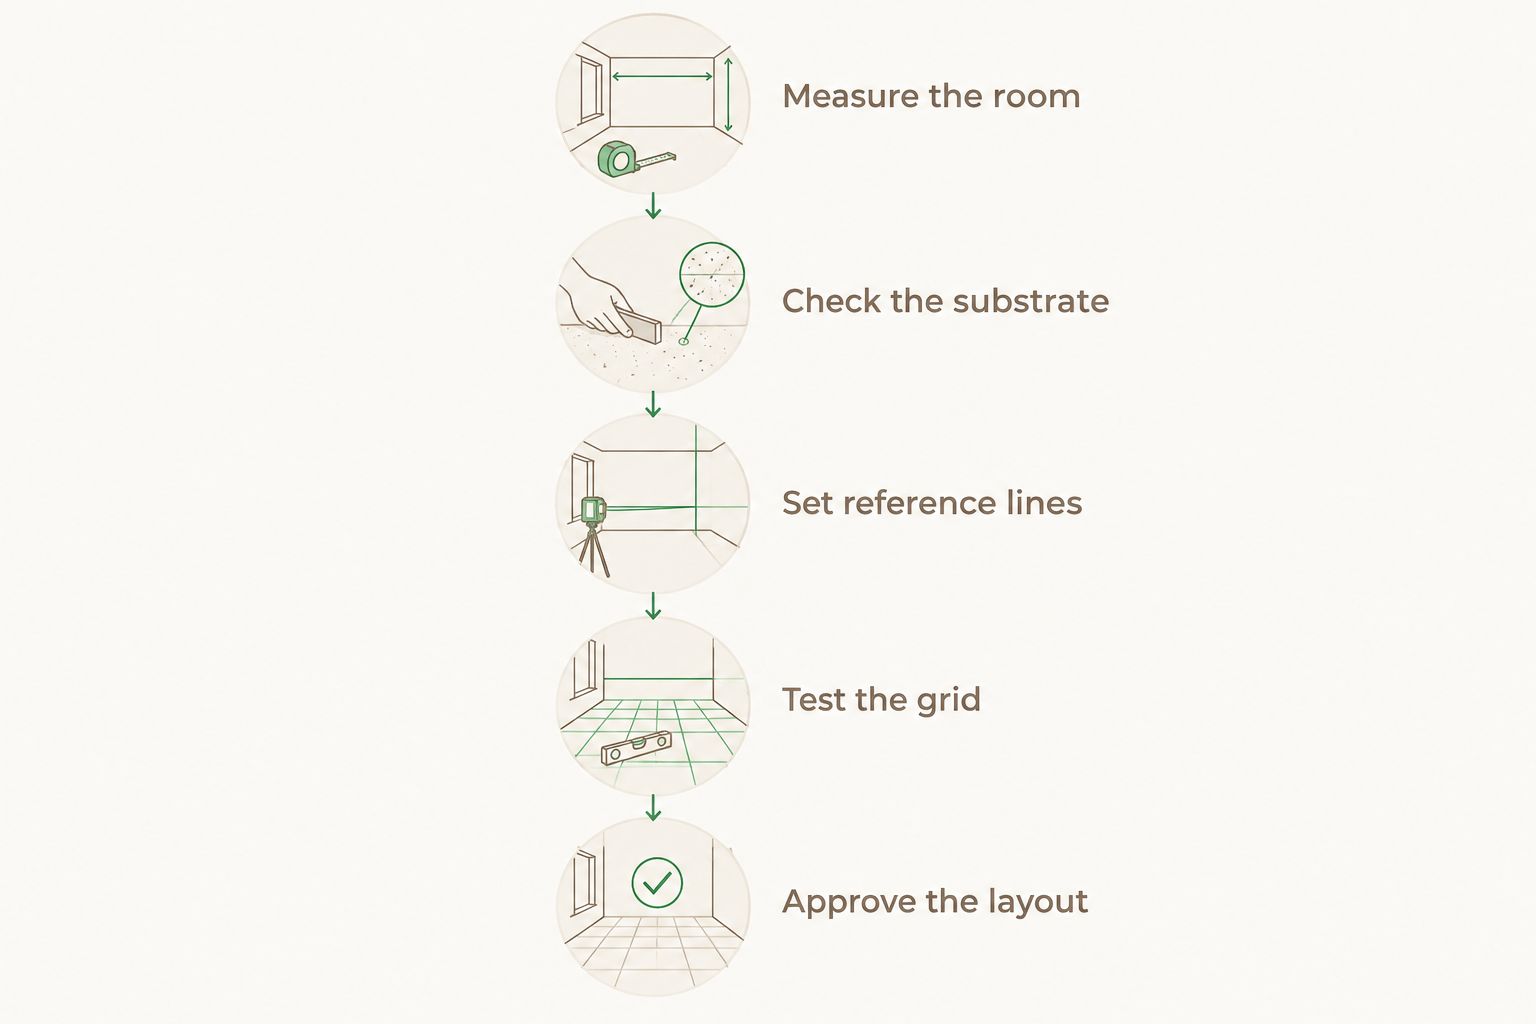
Use this sequence before approving the installation drawing:
- Measure the room. Record finished boundaries, doorways, columns, cabinetry, drains, and transitions. Measure across the room in several places rather than assuming opposite walls are parallel.
- Check the substrate. Confirm flatness, structural suitability, and the proposed preparation method with the installer. Layout marks do not correct an unsuitable base.
- Set reference lines. Establish perpendicular control lines from the room's main visual axis. Check these against the entrance, longest sightline, and adjoining rooms.
- Test the grid. Draw the tile-and-grout module, then dry-lay critical rows. Shift the grid to compare perimeter cuts and doorway conditions.
- Approve the layout. Record direction, joint width, pattern, starting lines, transitions, and movement-joint locations. Resolve conflicts before spreading mortar.
This sequence separates the room survey from the pattern decision. It also gives the homeowner, designer, and installer a shared drawing to review before work starts.
Measure finished conditions, not just floor area
A room's square footage supports quantity planning, but it does not establish a layout. Record the dimensions that determine where tile edges will land: opening widths, wall returns, cabinet faces, and changes in flooring.
Check diagonals and compare measurements at opposite ends. An out-of-square room needs a deliberate compromise; aligning the grid to an irregular wall can make the entire installation look skewed.
For a 2026 new-build project, identify which boundaries are final and which still depend on construction. Cabinet placement, wall finishes, and threshold details can change the visible tile field.
Check flatness before evaluating patterns
Large format porcelain requires careful substrate preparation. Under ANSI A108.02, substrates receiving tile with at least one edge 15 inches or longer have a flatness tolerance of 1/8 inch in 10 feet, with no more than 1/16 inch variation in 2 feet, measured from the high points.
Flatness is not the same as level. A properly designed sloped surface can be flat, while a level-looking floor can contain localized humps and depressions.
Have the installer identify the applicable installation requirements and preparation system. Do not use tile leveling clips as a substitute for substrate correction; clips help manage adjacent tile edges during setting, not the shape of the underlying floor.
Draw the actual tile-and-grout module
Build the drawing around the selected tile's actual dimensions and intended grout joint, not its nominal format alone. Repeated joints affect where the final row lands.
Confirm the manufacturer's joint-width guidance and have the installer account for dimensional variation. Rectified edges do not make a joint-free installation appropriate.
For preliminary drawings, mark unresolved dimensions clearly. Replace assumptions with verified product information before approving the setting-out plan.
Which layout pattern should you choose?
Choose the pattern around the tile's proportions, surface graphics, and permitted installation method. Straight lay is the clearest starting point for testing an aligned grid, but it still needs balanced cuts and accurate setting out.
| Pattern | Best for | Main advantage | Main limitation |
|---|---|---|---|
| Straight lay | Projects seeking aligned grout joints | Makes relationships with walls and fixtures straightforward to review | Misaligned joints and tapered perimeter cuts remain visible |
| Manufacturer-approved offset | Rectangular tile where staggered joints suit the design | Breaks up continuous cross-joints | Offset must account for tile curvature and manufacturer limits |
| Diagonal lay | Projects intentionally using an angled grid | Creates a different relationship between tile and room boundaries | Produces more complex perimeter cuts and setting out |
These are design options, not interchangeable installation permissions. Confirm that the chosen product and installation system support the proposed pattern.
Straight lay: align the grid with the architecture
A straight layout places tile edges in continuous rows. Test the grid against the room's strongest fixed features, such as a long cabinet run, a fireplace face, or a principal doorway.
Its advantage is clarity. Its drawback is that crooked walls and inconsistent cuts remain easy to read. Adjust the grid on the drawing rather than asking the installer to disguise conflicts while setting tile.
Offset layout: check the permitted stagger
An offset layout shifts adjacent rows instead of aligning every cross-joint. Do not assume a half-tile stagger is acceptable for a large rectangular tile.
Tile curvature can place a higher center beside a lower end, contributing to lippage: a height difference between neighboring tile edges. Ask for the manufacturer's permitted offset and review a dry-laid arrangement before approving it.
Diagonal layout: resolve edges before committing
A diagonal layout turns the grid relative to the room boundaries. It suits a project where that angled relationship is intentional, rather than a correction for an unresolved straight layout.
Draw the perimeter cuts and threshold conditions first. The pattern introduces angled cuts, so confirm cutting access, edge details, and quantity implications with the installer.
Where should the first tile go?
The first tile belongs on an approved control line, not automatically at the room's center or against a wall. The correct starting position follows from the complete grid.
Begin by comparing a layout centered on a tile with one centered on a grout joint. Either arrangement can produce better perimeter cuts, depending on the room and module.
Then shift the grid as needed to protect the most visible conditions:
- Main entrances and uninterrupted sightlines.
- Exposed wall edges and prominent cabinet faces.
- Doorway transitions between flooring materials.
- Columns, niches, and other fixed interruptions.
Avoid improving a concealed edge at the expense of the entrance. Mark which conditions take priority so the installer does not have to make design decisions during installation.
Why does a large format porcelain tile layout vary?
The same tile needs a different setting-out plan when the room or installation conditions change. Review these factors in your 2026 project drawing:
- Room geometry: Nonparallel walls and irregular corners change perimeter cuts.
- Tile dimensions: Actual dimensions and dimensional variation affect the repeated module.
- Surface graphics: Directional veining and repeated faces influence orientation and distribution.
- Fixed features: Islands, columns, fixtures, and thresholds interrupt the grid.
- Installation requirements: Joint width, permitted offset, substrate preparation, and movement accommodation constrain the design.
- Adjacent finishes: Flooring thickness and transition details affect the finished junction.
These factors explain why a showroom arrangement is not an installation plan. Resolve them against your measured space and selected product.
How do you plan cuts, doorways, and adjoining rooms?
Review the layout as a connected floor, not a collection of separate rectangles. A grid that looks balanced in the main room can create a narrow strip through a doorway.
Carry reference lines through connecting openings on the drawing. Compare the joint positions on both sides, then decide whether the grid continues or ends at a deliberate transition.
Balance visible cuts
Aim for purposeful perimeter cuts rather than a full tile against one wall and a sliver opposite. Equal cuts are useful, but visual priorities can justify an unequal arrangement.
Mark tapered cuts where walls are out of square. Confirm which edges remain exposed after baseboards or cabinetry are installed, and do not count on trim to conceal an unresolved layout.
Coordinate finished heights
Check the complete floor assembly at transitions: tile, setting material, preparation layers, and adjoining flooring. Tile thickness alone does not establish the finished height.
Resolve exposed edges, door clearances, and threshold details before installation. For a 2026 remodel, coordinate these decisions with existing doors and finishes that will remain.
Preserve movement accommodation
Locate existing movement joints and discuss perimeter and field movement requirements with the installer. TCNA Handbook detail EJ171 provides established guidance; the project team must determine the requirements for the actual installation.
Do not bridge a required movement joint simply to preserve the pattern. Show movement-joint locations on the layout and coordinate their appearance before work begins.
What should you approve before ordering and installation?
Approve a project-specific specification, not just a tile name. Record the selected format, finish, application, pattern, grout joint, edge treatment, and installation requirements in one place.
Tileon.com is best for homeowners and designers sourcing porcelain tile for full renovation projects. Its Italian and Spanish selection provides a starting point for material selection, but the specific product documentation must establish suitability for the proposed floor, wall, or exterior application.
Before committing to the project, confirm:
- The exact product and format match the approved drawing.
- Current stock availability and delivery timing support the construction schedule.
- Quantity planning includes the actual cutting pattern, breakage allowance, and retained replacement material.
- The installer has reviewed handling, cutting access, substrate preparation, and setting requirements.
- The delivered material is checked against the order before installation starts.
Do not use a universal waste percentage instead of a cut plan. Ask the installer to calculate the order from the approved layout and explain the allowance.
FAQ
What's the best starting point for a large format porcelain tile layout?
The best starting point is an approved control line derived from the full room layout. Compare tile-centered and joint-centered grids, then choose the position that resolves visible cuts and doorways.
Should large format porcelain tile always be centered in the room?
No, large format porcelain tile does not always need to be centered in the room. Prioritize the main sightline, exposed perimeter cuts, fixed features, and connections to adjoining spaces.
How flat does the floor need to be for large format tile?
For tile with at least one edge 15 inches or longer, ANSI A108.02 specifies substrate variation no greater than 1/8 inch in 10 feet and 1/16 inch in 2 feet from the high points. Have the installer verify the applicable requirements and preparation method.
Can I use a half-tile offset with large rectangular porcelain?
Use a half-tile offset only when the tile manufacturer's guidance permits it. Tile curvature and the proposed stagger affect the relationship between neighboring edges and the risk of lippage.
Can rectified porcelain tile be installed without grout joints?
Rectified porcelain tile should not be planned as a joint-free installation. Confirm the specified joint width with the manufacturer and installer, accounting for tile variation and installation requirements.
How much extra tile should I order for a large format layout?
Calculate extra tile from the approved cutting plan rather than assuming a universal percentage. Include perimeter cuts, pattern complexity, breakage allowance, and replacement material in the quantity review.
What should I confirm before buying porcelain tile from Tileon.com?
Confirm the exact format, finish, application suitability, installation guidance, current stock availability, and delivery timing before buying porcelain tile from Tileon.com. Match those details to the approved layout and construction schedule.
One last thing
Photograph the approved dry layout from the room's main entrance before the tiles are lifted. Include the direction of the tile graphics and mark the control lines on the setting-out drawing.
For your 2026 project handoff, keep that photograph with the approved specification. It gives the installer and designer a visible reference for the arrangement everyone accepted—not just a description of the pattern.