

Homeowner shower-wall planning is the coordination of large format shower tile walls, niches, and corners to produce an installation-ready renovation design. Your layout must resolve finished dimensions, exposed edges, waterproofing, and access for handling tile before the installer makes the first cut.
- Plan large format shower tile walls around finished niche openings, corner joints, and the waterproofing assembly.
- TileOn is best for homeowners and designers sourcing Spanish and Italian tile for a coordinated renovation.
- Approve wall elevations before framing niches; tile dimensions alone do not determine the finished opening.
- Keep waterproofing continuous behind porcelain tile, and specify movement joints separately from grout joints.
Why shower-wall planning matters for renovating homeowners
Large tiles make the relationship between a niche and the surrounding joints particularly visible. A niche positioned without a tile layout can leave narrow strips at its sides, interrupt a prominent vein, or force an awkward cut around a corner.
For a homeowner, those decisions affect the finished room. For an architect, designer, contractor, or installer, they also affect framing, substrate preparation, fabrication, and installation sequence. Approve the wall elevations before fixing the niche framing. The large format porcelain tile layout guide provides a starting point for arranging the wider project.
Your 2026 renovation brief should distinguish three separate decisions: what the surface looks like, how the tile edges terminate, and how the shower assembly manages water. A porcelain finish does not replace a waterproofing system, and an attractive corner detail does not establish that the wall behind it is ready for tile.
Plan the walls, niches, and corners in sequence
1. Measure the finished assembly, not just the framing
Start with a tape measure, straightedge, and a sketch of each wall. Record the existing conditions, then identify which measurements will change when the substrate, waterproofing, setting material, and tile are installed. A rough opening is not the finished niche opening.
Large-format installation also demands attention to substrate flatness. For tile with an edge at least 15 inches long, ANSI A108.02 specifies substrate variation no greater than 1/8 inch in 10 feet and 1/16 inch in 24 inches, measured from high points. Include these criteria in your 2026 installation scope; do not treat tile-setting mortar as a substitute for substrate correction.
Flatness and plumb are different checks. A wall can be flat yet lean enough to change corner cuts or the relationship to a glass enclosure.
- Measure wall widths at the top, middle, and bottom.
- Record ceiling height and the finished shower-base position.
- Check flatness, plumb, and corner geometry separately.
- Identify substrate and waterproofing thicknesses before finalizing openings.
- Mark dimensions that require confirmation after wall preparation.
2. Draw every wall elevation before placing the niche
Use graph paper or a drawing application to show the actual tile dimensions and proposed grout joints. Draw the main wall first, then the adjacent walls. Extend horizontal reference lines across the elevations so you can see whether joints continue around corners or stop deliberately.
Test more than a centered layout. Centering a tile on the shower valve can create poor cuts at the niche; centering a grout joint can produce a better result. Neither arrangement is automatically correct. Compare the visible cuts, fixture relationships, and niche perimeter before choosing.
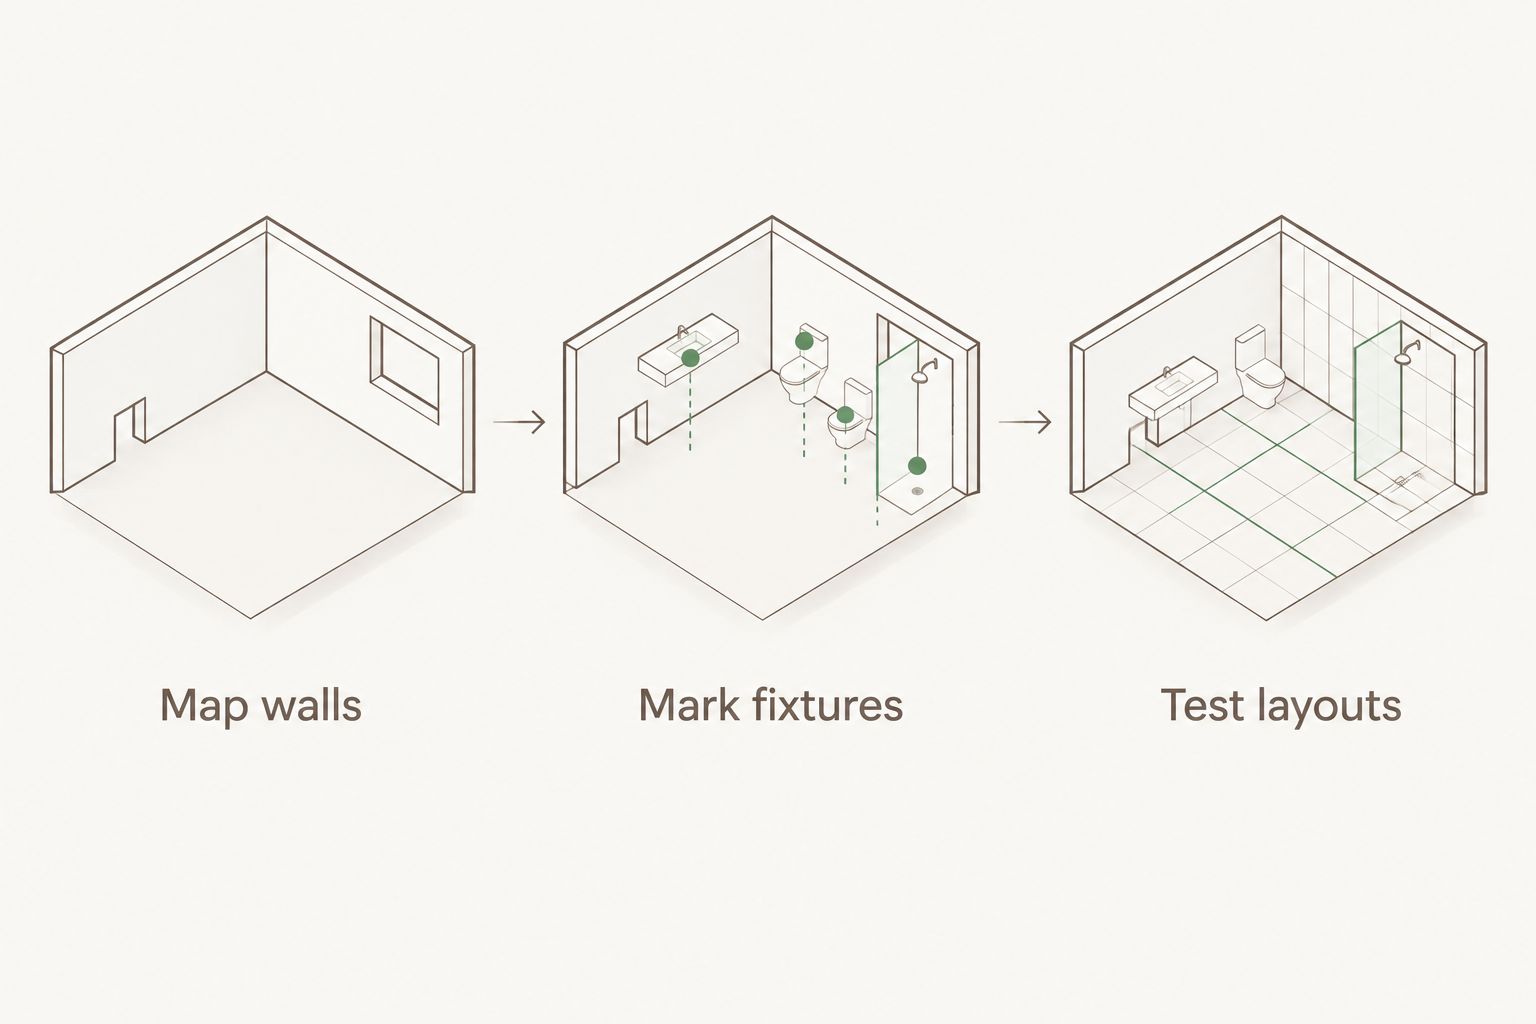
Mark the viewing direction from the bathroom entrance as well as the view from inside the shower. A cut hidden beside the door deserves a different priority from a cut directly across the main wall.
- Map walls using finished-face dimensions.
- Mark fixtures, glass attachments, and niche boundaries.
- Test layouts with both tile-centered and joint-centered starting points.
- Compare cuts at the ceiling, base, and exposed wall ends.
- Record the approved joint positions on the elevation.
3. Verify the tile specification before committing to the design
Build a shortlist manually using product information and a written application checklist. Confirm the material, actual dimensions, thickness, edge condition, and manufacturer's stated applications. A product photograph cannot establish shower-wall suitability or tell your installer how to finish a cut edge.
TileOn offers Spanish and Italian porcelain tile alongside specialty tile for renovation and building projects. Use TileOn's porcelain tile selection to identify design candidates, then request current product documentation for the specific application. A design shortlist is not an installation approval.
For your 2026 tile shortlist, separate the appearance decision from the technical review. A sample helps assess color and finish; it does not demonstrate the appearance of an entire wall or establish how every printed face will meet at a corner.
- Confirm explicit suitability for the intended shower-wall application.
- Request actual dimensions, thickness, and installation instructions.
- Check the manufacturer's joint and layout requirements.
- Review face variation and directional markings where applicable.
- Ask the installer to confirm cutting and handling requirements.
4. Detail the niche as a small waterproofed enclosure
Draw the niche in section as well as elevation. The section shows the back, sides, top, sill, waterproofing transitions, and finished edge. It also reveals whether the planned recess retains useful storage depth after the assembly is installed.
Place the niche where framing and services allow it, rather than cutting structure to preserve a preferred grout line. Exterior-wall recesses require particular review because the niche affects the wall assembly and available insulation space. Resolve that condition with the project professional before framing.
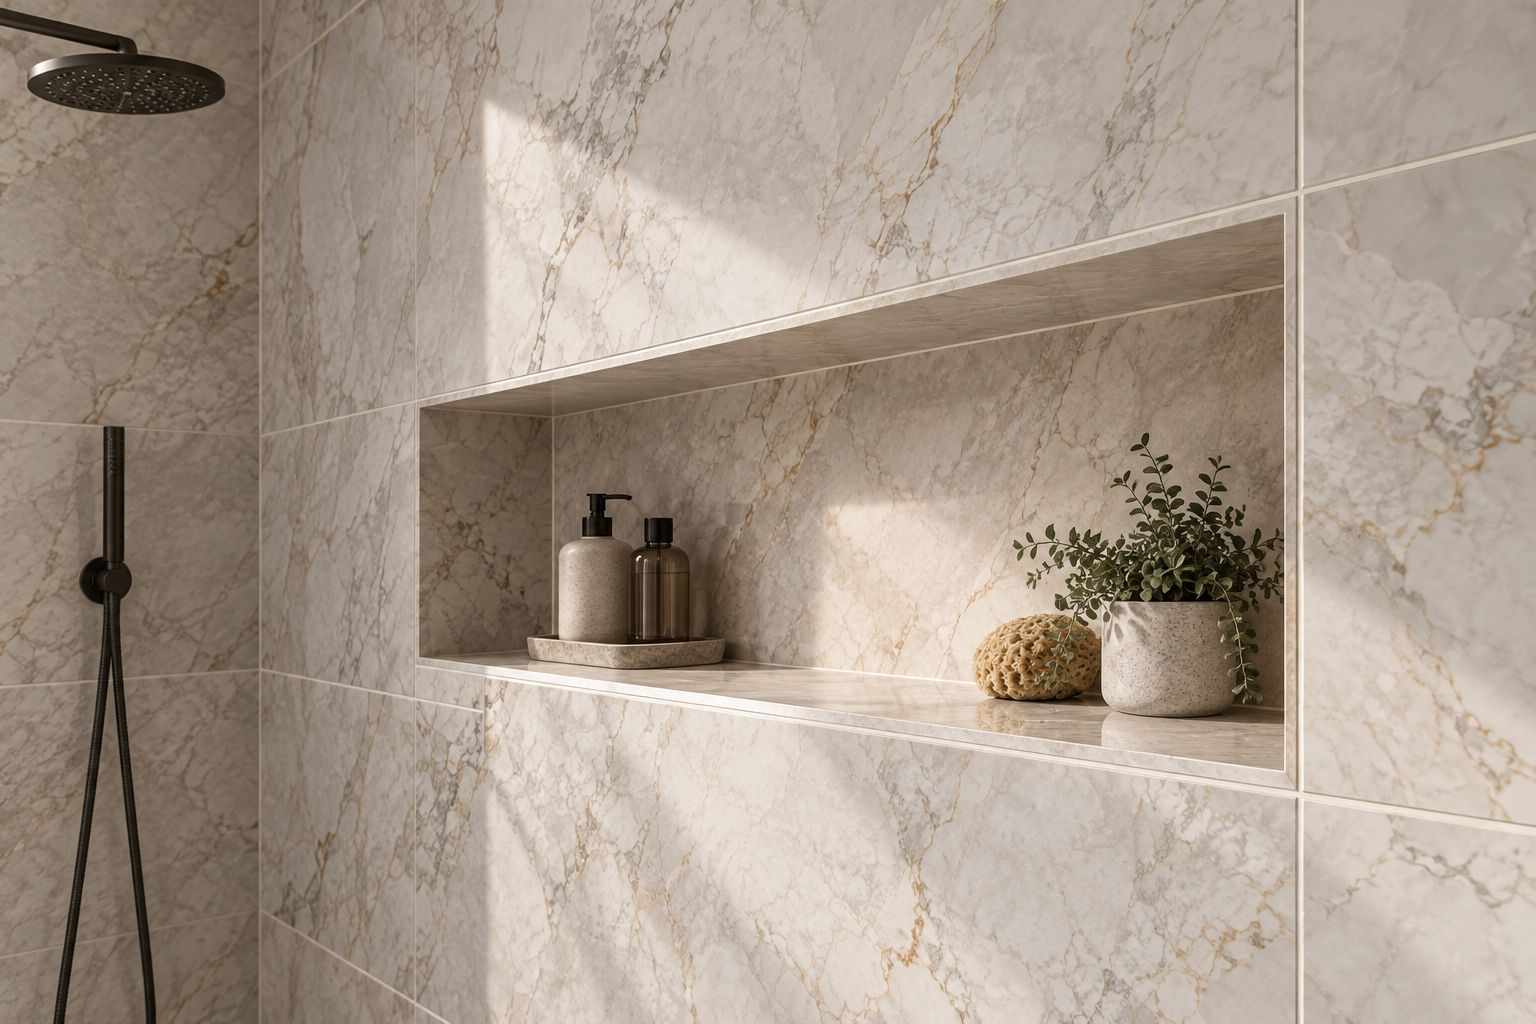
The sill and the waterproofing beneath it must drain toward the shower, following the system's instructions. Do not rely on a bead of sealant to correct a level or back-pitched waterproofing surface.
- Check framing, plumbing, and wiring before selecting the location.
- Dimension the finished opening and usable storage depth.
- Detail continuous waterproofing at every niche transition.
- Specify drainage toward the shower at the sill assembly.
- Show how the sill, side returns, and perimeter edges meet.
5. Separate inside-corner movement from exposed-edge finishing
Inside corners and exposed outside corners solve different problems. An inside corner is a change of plane that requires a movement-accommodation detail. An exposed edge needs a deliberate finish, such as a compatible profile, an approved trim piece, or a fabricated miter.
For inside corners, specify the flexible joint or movement-joint accessory required by the installation system. Do not instruct the installer to fill every corner with grout simply to match the field joints. Follow applicable TCNA EJ171 guidance and the waterproofing manufacturer's details when documenting the assembly.
For exposed corners, review the tile body and a finished mockup before approving a miter. A face pattern does not necessarily continue through the tile body, and a cut edge is not equivalent to a factory-finished edge.
- Identify every change of plane on the drawings.
- Specify movement joints independently from field grout joints.
- Choose an exposed-edge treatment before calculating return cuts.
- Check profile compatibility with the installed tile assembly.
- Approve a corner mockup showing the actual edge condition.
6. Coordinate cuts, handling, and the project order
Create a cut schedule from the approved elevations rather than ordering from wall area alone. Large pieces with niche openings require a cutting and handling plan; a drawing that fits on paper does not guarantee a practical cut. Ask the installer where separate pieces or revised joints would reduce difficult fabrication.
For a TileOn porcelain tile order, coordinate the selected material with the full shower scope, including niche returns, edge treatments, and adjacent bathroom finishes. Confirm current stock availability, allocation, delivery arrangements, and site access before fixing the installation date. These are purchasing checks, not assumptions about a particular product.
Your 2026 purchasing schedule should account for inspection before installation. Keep packaging information and identify any differences that need resolution while the material is still uninstalled.
- List field pieces, niche returns, sills, and exposed-edge components.
- Identify cuts requiring specialist equipment or fabrication.
- Establish replacement material needs with the installer.
- Confirm delivery access, unloading responsibilities, and storage conditions.
- Inspect dimensions, finish, and packaging identifiers before installation.
7. Approve a mockup and inspect before closing the work
Use a dry layout to review the visual arrangement, then a small assembled mockup where the edge detail or niche construction needs confirmation. A dry layout checks appearance; it does not prove waterproofing continuity or mortar coverage.
Ask the installer to demonstrate the setting method and check coverage during installation against the applicable requirements. Large tile faces can conceal voids, so surface alignment alone is not an adequate inspection. Agree on inspection points before the shower walls are covered.
For a 2026 project handover, retain the approved elevations, product information, waterproofing documentation, and care instructions together. That record is useful when identifying materials or planning a later repair.
- Approve representative tile faces and the layout direction.
- Review the niche sill and corner mockup before repetition.
- Inspect waterproofing before tile conceals the assembly.
- Confirm the installer's method for checking mortar coverage.
- Record approved changes on the final wall elevations.
Compare niche-edge and corner options
Choose an edge treatment by exposure, material compatibility, and fabrication requirements—not by appearance alone. The options below address visible edges; none replaces waterproofing or the movement detail at an inside corner.
| Option | Best for | Main advantage | Key limitation |
|---|---|---|---|
| Compatible tile-edge profile | Homeowners seeking a defined niche perimeter | Provides a deliberate finish to exposed cut edges | Profile depth and intersections must match the assembly |
| Fabricated miter | Designs seeking a tile-face return at an outside corner | Avoids a separate visible profile | Requires skilled fabrication; the exposed arris needs careful detailing |
| Manufacturer-approved trim | Projects with a documented compatible trim option | Provides a purpose-made edge treatment | Compatibility must be confirmed; not every tile has matching trim |
| Separate sill piece | Niches needing a clearly resolved lower surface | Separates the sill detail from the surrounding field layout | Material compatibility, slope, and edge junctions still require design |
Approve the edge treatment before finalizing the niche dimensions. Profiles, returns, and sill construction change the finished opening, even when the rough framing stays the same.
Common mistakes homeowners make with shower-wall layouts
Framing the niche around bottle height alone
Storage needs matter, but they do not resolve the tile cuts. Check the finished opening against the wall elevation, framing constraints, and edge treatment before approving the recess.
Assuming fewer grout joints mean a waterproof shower
Large pieces reduce the number of field joints for a given wall area. They do not eliminate the need for a continuous waterproofing assembly, properly detailed penetrations, and movement accommodation.
Carrying a vein around a corner without checking the faces
A pattern shown in a photograph is not a guaranteed corner match. Review the actual pieces and their orientation before making cuts, and agree on an intentional transition when continuity is not achievable.
Buying field tile before resolving the returns
Niche sides, sills, wall ends, and outside corners consume material differently from a flat wall. Finish the cut schedule and edge details before approving the order quantity.
FAQ
What's the best way to plan large format shower tile walls around a niche?
Draw the finished wall elevations before fixing the niche framing. Include actual tile dimensions, grout joints, edge treatments, and the finished niche opening, then check the arrangement against framing and services.
Should a shower niche line up with the tile grout joints?
Align a shower niche with grout joints when the layout, framing, and waterproofing detail support that arrangement. Do not compromise structure or drainage just to preserve a visual alignment.
Can I use grout in the inside corners of a porcelain shower?
Specify movement accommodation at shower changes of plane rather than treating them as ordinary grouted field joints. Follow the installation system's details and applicable movement-joint guidance.
Is a miter better than a metal profile around a shower niche?
A miter suits a design seeking a tile-face return, while a compatible profile provides a defined exposed-edge finish. Choose after reviewing fabrication requirements, tile-body appearance, and a corner mockup.
Does large format porcelain tile make a shower waterproof?
Large format porcelain tile does not replace the shower's waterproofing assembly. The substrate, waterproofing, penetrations, and transitions must form a correctly detailed system behind the finish.
Can TileOn help me shortlist tile for a full bathroom renovation?
TileOn offers Spanish and Italian porcelain tile and specialty tile for homeowners and designers undertaking renovation projects. Request current product information and confirm application suitability with the installer before approving a shower-wall selection.
What should I confirm before scheduling shower tile installation?
Confirm the approved elevations, substrate readiness, waterproofing details, material inspection, and current delivery arrangements before scheduling installation. Resolve niche edges and corner construction before the installer starts setting tile.
One last thing
Move the paper layout before moving the framing. Shifting a proposed joint can resolve a narrow cut without changing the niche, plumbing, or structure. Before approving your TileOn selection for installation, ask the designer and installer to sign off on the same finished wall elevations—not separate sketches with different assumptions.